
| Applescript | ||||||
| Cisco | ||||||
| Cumulus | ||||||
| Exchange | ||||||
| Filemaker | ||||||
| Mac | ||||||
| Outlook Mac | ||||||
| Outlook PC | ||||||
| Perl | ||||||
| QPS | ||||||
| Quark | ||||||
| Windows | ||||||
| About Us | ||||||
Sharing your mail with others
One of the best features of Outlook for the Mac is the ability to share email accounts with other users while still monitoring your own email account. Unfortunately, setting up this feature is not intuitive. In fact, it's quite clumsy. But here's how to do it:
You must first log in to the the account you want to share. You'll have to create a profile for that user and you'll have to know the user's password or ask them to perform this step for you.
When you are logged in, you'll want to go to the VIEW menu and show the folder list (command-option-j). You must be able to see the user's mailbox and the inbox.
Click on the Mailbox icon ![]() one time. Then go to FILE menu and select PROPERTIES. The following dialog box will appear:
one time. Then go to FILE menu and select PROPERTIES. The following dialog box will appear:
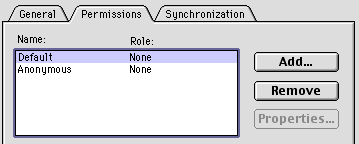
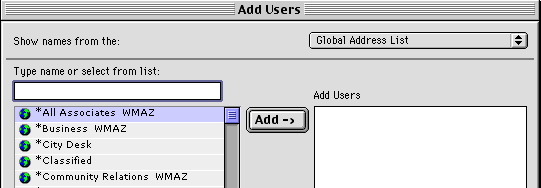
Click the ADD button and you will be prompted to select the users you want to have access to this list. (This is the top half of the window, the lower half is shown later).
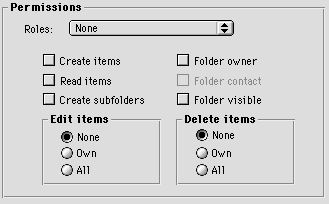
You can add as many users as you like. Just keep finding users, and pressing the ADD button. When you are done, click the OK button and you'll be able to assign permissions to the users. (This is the lower half of the screen shown in the first screen shot). You'll need to click on one user at a time to assign rights to that user. To do that, either click on the pop-up menu next to the word "Roles" and can choose from preset permissions, or you can create your own by checking the boxes next to the funtions you want the user to be able to perform. Remember to repeat this process for each user.
When you're all done, click on the OK button. Then go back to the folder list and click the INBOX![]() item. You'll then have to go back to the FILE menu and select the PROPERTIES item again, just like you did for the Mailbox. Repeat the same steps for the INBOX as you did for MAILBOX (select the users, give them rights).
item. You'll then have to go back to the FILE menu and select the PROPERTIES item again, just like you did for the Mailbox. Repeat the same steps for the INBOX as you did for MAILBOX (select the users, give them rights).
After that process is complete, you can quit Outlook as this user and restart the application. This time, log in as the person who needs to be able to read the email.
Go to the TOOLS menu and select the SERVICES item. With "Microsoft Exchange Server" selected, select the PROPERTIES button.
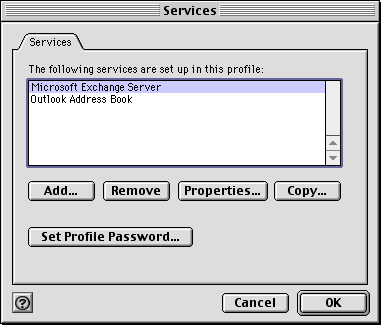
You should see the following window:
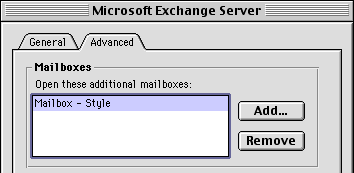
Under the ADVANCED tab, click the ADD button. Type in the exact name of the email account you want to be able to read. This should be the account accessed in the first step. Click OK.
Go to the VIEW menu and show the folder list (command-option-j). 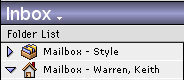
You should be able to see the mailbox for yourself and the shared account.